Here are some of the basic shapes of paper quilling.

From there its all about patterning. Having a shape you want it to look like and using the right scrolls in the right places to match the pattern you want to go for. One of the things I found particularly helpful is an adjustable temporary board. Essentially all I did was take a slightly sticky surface (kind of like that of a post-it note) laid out in the size and shape of the final piece and use it to place pieces in spots as I went. Having something that you can move pieces around is super helpful especially when you aren't sure where you want everything just yet. Once you glue the paper to the real backing you're kinda stuck with it. Even if you can get the piece off it still leaves that glue residue that will make the whole thing look less than professional.
Helpful Hint

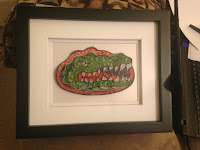
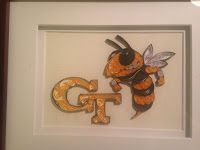
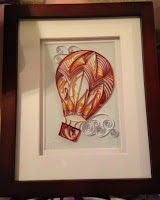
I found these frames at Joann's that are absolutely perfect for quilled projects. Mostly because the glass pops out enough so that the paper doesn't get crushed, but also because the portrait area is only 5 X 7 (which you will realize is important as soon as you start.) A lot of times you can even find them on sale which makes them a win-win...-win. Yeah, 3 wins. 
Check out my stuff here.
No comments:
Post a Comment